Help: Difference between revisions
(Adding supporting images for Help Page) |
mNo edit summary |
||
| Line 43: | Line 43: | ||
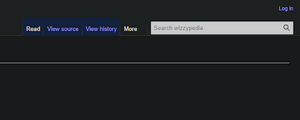
When editing a page, the default view is usually ''Source editing'', which is best used by those who are familiar and comfortable with markup language. To access this editor, select ''Edit source'' in the tabs by the search bar or use the Pencil dropdown in the editing window. | When editing a page, the default view is usually ''Source editing'', which is best used by those who are familiar and comfortable with markup language. To access this editor, select ''Edit source'' in the tabs by the search bar or use the Pencil dropdown in the editing window. | ||
[[File:Search Bar.png|border|frameless|690x690px]][[File:Editing Style Dropdown.png|border|frameless|357x357px]] | [[File:Search Bar.png|border|frameless|690x690px]] | ||
[[File:Editing Style Dropdown.png|border|frameless|357x357px]] | |||
<code>'''🔍''' Source editing is an advanced form of editing and is typically used for adding code-based functionality to the wiki.</code> | <code>'''🔍''' Source editing is an advanced form of editing and is typically used for adding code-based functionality to the wiki.</code> | ||
| Line 66: | Line 69: | ||
=== Headings & Sub-Headings === | === Headings & Sub-Headings === | ||
Adding a hierarchy of headings and sub-headings helps to break down content and makes information on complex pages easier for users to navigate. | Adding a hierarchy of headings and sub-headings helps to break down content and makes information on complex pages easier for users to navigate. | ||
[[File:Text Style Dropdown.png|border|frameless|346x346px]] | |||
<code>⚠️ Think of '''headings''' as a main topic of interest for a page and '''sub-headings''' as complements for each individual heading. A page can contain multiple headings and sub-headings.</code> | <code>⚠️ Think of '''headings''' as a main topic of interest for a page and '''sub-headings''' as complements for each individual heading. A page can contain multiple headings and sub-headings.</code> | ||
[[File:Table of Contents Example | [[File:Table of Contents Example.png|border|frameless]] | ||
''For example'': | ''For example'': | ||
In the article for [[The Gate to the Seventh Realm]], the page is structured into seven headings, four | In the article for [[The Gate to the Seventh Realm]], the page is structured into seven headings, four ''Sub-heading 1'', and three ''Sub-heading 2'' as shown in its table of contents. | ||
=== Tables of Contents === | === Tables of Contents === | ||
| Line 168: | Line 173: | ||
A new section of the upload popup will appear, prompting for a Name for the media as well as a description, and then click ''Save'' in the upper right hand corner to add the media to Wizzypedia. | A new section of the upload popup will appear, prompting for a Name for the media as well as a description, and then click ''Save'' in the upper right hand corner to add the media to Wizzypedia. | ||
[[File:Image Upload Window 1.png|border|frameless]][[File:Image Upload Window 2.png|border|frameless]] | [[File:Image Upload Window 1.png|border|frameless]] [[File:Image Upload Window 2.png|border|frameless]] | ||
<code>⚠️ If uploading an image originating from another user or artist, please credit them in the Name or Description of the file.</code> | <code>⚠️ If uploading an image originating from another user or artist, please credit them in the Name or Description of the file.</code> | ||
Revision as of 14:40, 20 November 2024


Wizzypedia is one of the foundational tools for Forgotten Runes Wizards Cult. Along with the Book of Lore, it helps to power the knowledge base of the Loracle—the Wizards’ bespoke Large Language Model—and provides a consolidated library of data for creatives who want to build on Forgotten Runes.
This is an encyclopedic collection of information and meta-lore about the Runiverse, the world of Forgotten Runes, and it’s critical that it remains easily accessible and as organized as possible.
This guide is intended to assist all scribes, new and tenured, in creating a more unified source for Magical reference.
Logging In
After receiving editorial permissions for Wizzypedia, one of the main ways to contribute is through the creation and maintenance of pages and their content, but first a login is required.
Click Log In in the upper right hand corner of Wizzypedia’s home page.
Then, enter credentials on the following page.
🔍 Tag @MagusWazir in The Secret Tower for permission to edit Wizzypedia
Creating a New Page
After a successful login, users will have the ability to make edits on pages within their unique set of permissions.
To create a new page, the user must enter the Title of the new page in the search bar. This generates a search results page where the user can see if a page already exists on their subject.
A Page Already Exists
If a page already exists on the topic of choice, simply click on that page in the search results and select the Edit or Edit source tab to begin making additions.
These tabs are found in the upper right hand corner of the page by the Search bar.
A Page Does Not Exist
If a page does not exist for the desired entry, an option to create the page will appear above the first search result. Clicking this link will create a new page with that title.
⚠️ It is imperative to check for spelling when creating a new page, as page names cannot be changed after creation.
Editing a Page
Source Editing
When editing a page, the default view is usually Source editing, which is best used by those who are familiar and comfortable with markup language. To access this editor, select Edit source in the tabs by the search bar or use the Pencil dropdown in the editing window.
🔍 Source editing is an advanced form of editing and is typically used for adding code-based functionality to the wiki.
Reasons to Use Source Editing
As a typical user, there are a few reasons why one might need to edit a page’s source:
- Adding a Category
- Using Redirects
While there are options to make these changes in visual editing mode, editing source is occasionally a more streamlined process.
Visual Editing
Visual editing is an extension that helps users add content to Wizzypedia with greater ease. Rather than requiring knowledge of markup, visual editing allows formatting and structuring similar to word processing applications like Microsoft Word or Google Docs.
With this visual editing toolbar, it’s easy to add headings, text formatting, links to other pages, lists, templates, tables, images, galleries, and special symbols.
Structuring a Page
Headings & Sub-Headings
Adding a hierarchy of headings and sub-headings helps to break down content and makes information on complex pages easier for users to navigate.
⚠️ Think of headings as a main topic of interest for a page and sub-headings as complements for each individual heading. A page can contain multiple headings and sub-headings.
For example:
In the article for The Gate to the Seventh Realm, the page is structured into seven headings, four Sub-heading 1, and three Sub-heading 2 as shown in its table of contents.
Tables of Contents
Along with digestibility, using headings to separate information on Wizzypedia pages also automatically creates a table of contents at the top of the article when four or more headings exist. Tables of contents contain clickable links that take the user to specific anchors on a page.
⚠️ Links in the table of contents may be copied and used as internal references on different pages in the wiki.
For example:
If there was a page that mentioned Red Hat Wizards, an editor could add a link to the Red Hats sub-heading on the Wizards (Runiverse) page from the page they are editing. This is particularly useful for interlinking specific sections of content.
⚠️ A table of contents will not appear on the article until all edits are saved.
Additional Paragraph Formatting Tools
Preformatted
Preformatted text is useful for preserving formatting like line breaks, spaces and indentations which can be crucial for displaying texts like programming code to keep structure and syntax intact.
For example:
In this image, the preformatted text in white is used to display code in the Decoder Crystal article.
Block Quote
Block quotes separate sections of text with a distinct format used to emphasize important statements or cite sources.
Using block quotes to highlight quotations also improves readability with visual indicators that allow the reader to separate it from the main text.
For example:
Block quotes in this Wizard Wednesday Recap separate direct quotes from the paraphrased content.
Page Title
The Page Title paragraph formatting option goes largely unused on Wizzypedia, relying on article Page Names to serve as the titles for individual pages. As such, using Title formatting is discouraged.
⚠️ Please do not use Page Title formatting.
For example:
The Page Name for the Wizards (Runiverse) page also serves as the article’s Page Title.
Paragraph
Paragraph formatting changes any other formatting selections back to normal paragraph text.
Categories
Pages about similar topics may be organized into Categories as a way to keep them together in an accessible collection.
Adding a Page to a Category
A page may be added to a category in either visual editing mode or source editing mode.
Adding Categories In Visual Editing Mode
In visual editing mode, start by clicking on the hamburger button on the right side of the visual editing toolbar. Then, select Categories from the dropdown.
Next, in the Options window, type in the desired category in the Add a category text box.
🔍 If an appropriate category already exists, select it from the Matching categories results. If an appropriate category doesn’t exist, select the result under New category.
Adding Categories In Source Editing Mode
To add a page to a category in source editing mode, simply add the following text at the bottom of the text edit window:
[[Category:YourCategory]]
This text must be surrounded by two sets of brackets. Replace the placeholder text “YourCategory” with the desired category, such as “Locations,” “Artists,” “Wizard Wednesday,” "Help," etc.
🔍 If the added category does not exist, Wizzypedia will automatically create a new one.
Images
An excellent way to add value to a Wizzypedia page is by adding images that help to elevate the content. Images can entice readers to look further into the text-heavy articles and elevate the experience and aesthetic of the page by signposting the content.
Uploading New Images
Uploading new images to Wizzypedia is a simple process, as most images, videos, and gifs can be drag-and-dropped right into the visual editor.
After dropping in the new image, the Media settings window will pop up.
Check the box next to This is my own work and then click Upload in the upper right hand corner to proceed.
A new section of the upload popup will appear, prompting for a Name for the media as well as a description, and then click Save in the upper right hand corner to add the media to Wizzypedia.
⚠️ If uploading an image originating from another user or artist, please credit them in the Name or Description of the file.
After clicking Save, select Use this image in the last Media settings popup to add the uploaded media to the current page.
Using Images Uploaded to Wizzypedia
Wizzypedia already has a wealth of images, gifs, and videos that may fit the context of new pages. In addition to uploading new media, relevant media might already exist in the archive. To use and image, select the Insert drop down menu in the visual editing toolbar. Then, select the first option in the menu: Images and media
A new Media settings window will pop up, and


